Using a 75mm adapter I was able to center my 98mm Aeropack motor retainer. What I hate about the larger retainers is that with the smaller ones you get a 1/4" lip of motor tube to help center the Aeropack. Mine has the motor tube flush with the aft bulkhead which makes it hard to center. With the 75mm adapter in place it was fairly simple. I carefully drilled out dimples where the holes were.
 Ready to go to the drill press
Finishing out the holes
 Even though there were allen wrench sockets in the inserts I preferred to use the insert T-Wrench I bought a while back.
Inserts........ah.......inserted

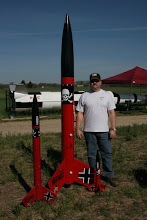
Everthing lined up. Thankfully my fins sweep back far enough that the adapter assembly won"t take on any damage when it lands.

The fins were originally cut to support a 75mm motor tube. I will be using a 98mm so I need to trim some of the tab off.

A simple jig set up on my tablesaw sled does the trick

Aligning the 3 fins on the 3 centering rings

Alignment marks on the motor tube

A trick I saw on the Rocket Forum. I hung a weight from the tip of the fin and carefully aligned it till the string matched the fin

My son helping me with the alignment.

Setting up to cure

All three finished...well, almost...
After I got the last fin epoxy tacked and ready to fillet, one of the fins popped loose which threw the whole rig off balance which popped the other two fins off. Come to find out, 2 pound fins don't hold well with just tacking...so...


I drew out a jig which will allow the motor mount to sit on the jig (bolted, actually) and will allow the fins to hang down.
More on the Jig a little later......


 Here you can see the misalignment I talked about earlier.
 With the plastic tubes in place I wanted to strengthen it up so I layed up some fiberglass. I had to use CA to keep the fiberglass tight around the curves.
 Application of my blood red epoxy